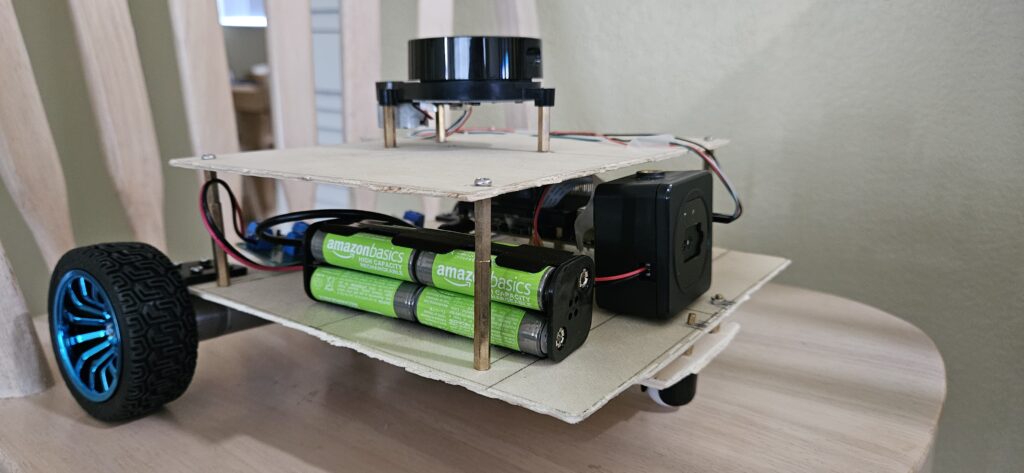
What is Tawnamy Bot?
In a word, Tawnamy bot is my first official attempt at making an autonomous robot. The name itself is a pun on “autonomy” and also a reference to the color tawny, which is the color I plan to make the robot once I 3D print all its parts
Tawnamy bot started off as nothing but an idea and a wish of mine after my senior design project in college. I realized after that project that I wanted to actually make a small, personal robot that was autonomous and able to map and navigate its environment
Tawnamy Bot is loosely modeled after the TurtleBot3 Waffle Pi robot. Like the TurtleBot3, Tawnamy Bot will use differential drive (i.e., two wheels and a caster wheel), and the chassis will consist of a collection of 3D-printed parts in a roughly square or rectangular shape. For power, it will utilize a 12V DC rechargeable battery, and for motion, it will use two 12V DC motors with magnetic encoders.
In terms of hardware, Tawnamy Bot will utilize a Raspberry Pi 4B (8GB), an Arduino Nano RP2040 Connect, an LD20 LiDAR sensor, an Arducam Time-of-Flight (ToF) camera, and an L298N H-Bridge motor driver.
The Raspberry Pi will be the brain of the robot. It will receive and process all the data from the LiDAR and ToF camera via ROS 2. It will also communicate with the Arduino microcontroller via Micro-ROS over the UART pins.
The Arduino will control the motors based on what the Raspberry Pi communicates to it. The Arduino will also be responsible for calculating odometry from the motor encoders and sending that data back to the Raspberry Pi.
I plan to utilize the ROS 2 Nav2 stack and SLAM (Simultaneous Localization and Mapping) to allow the robot to map and navigate its environment. The Nav2 stack largely includes most of the algorithms I need built in, so this project will be more about me figuring out how to use the Nav2 stack rather than creating or implementing actual algorithms.
This project has a lot of different parts to it, and a lot of challenges I need to overcome in order to complete it. Already I have had to learn A LOT of new things, including the use of Micro-Ros, THT soldering, and 3D printing.
I don’t expect this project to be done anytime soon, but I do hope to have a rough prototype in the works sometime next year. As time goes on, I’ll improve upon certain parts of this project, so be sure to check back here and my blog for any new updates and information!